If you wish to set up Microsoft Dynamics 365 F&O on the RootFi Portal, you will need to follow the steps outlined below.
Setting up OAuth Credentials
Part 1: Create an App
Follow the link https://portal.azure.com/#view/Microsoft_AAD_RegisteredApps/ApplicationsListBlade
Click on the +New Registration, you will see a form like this.
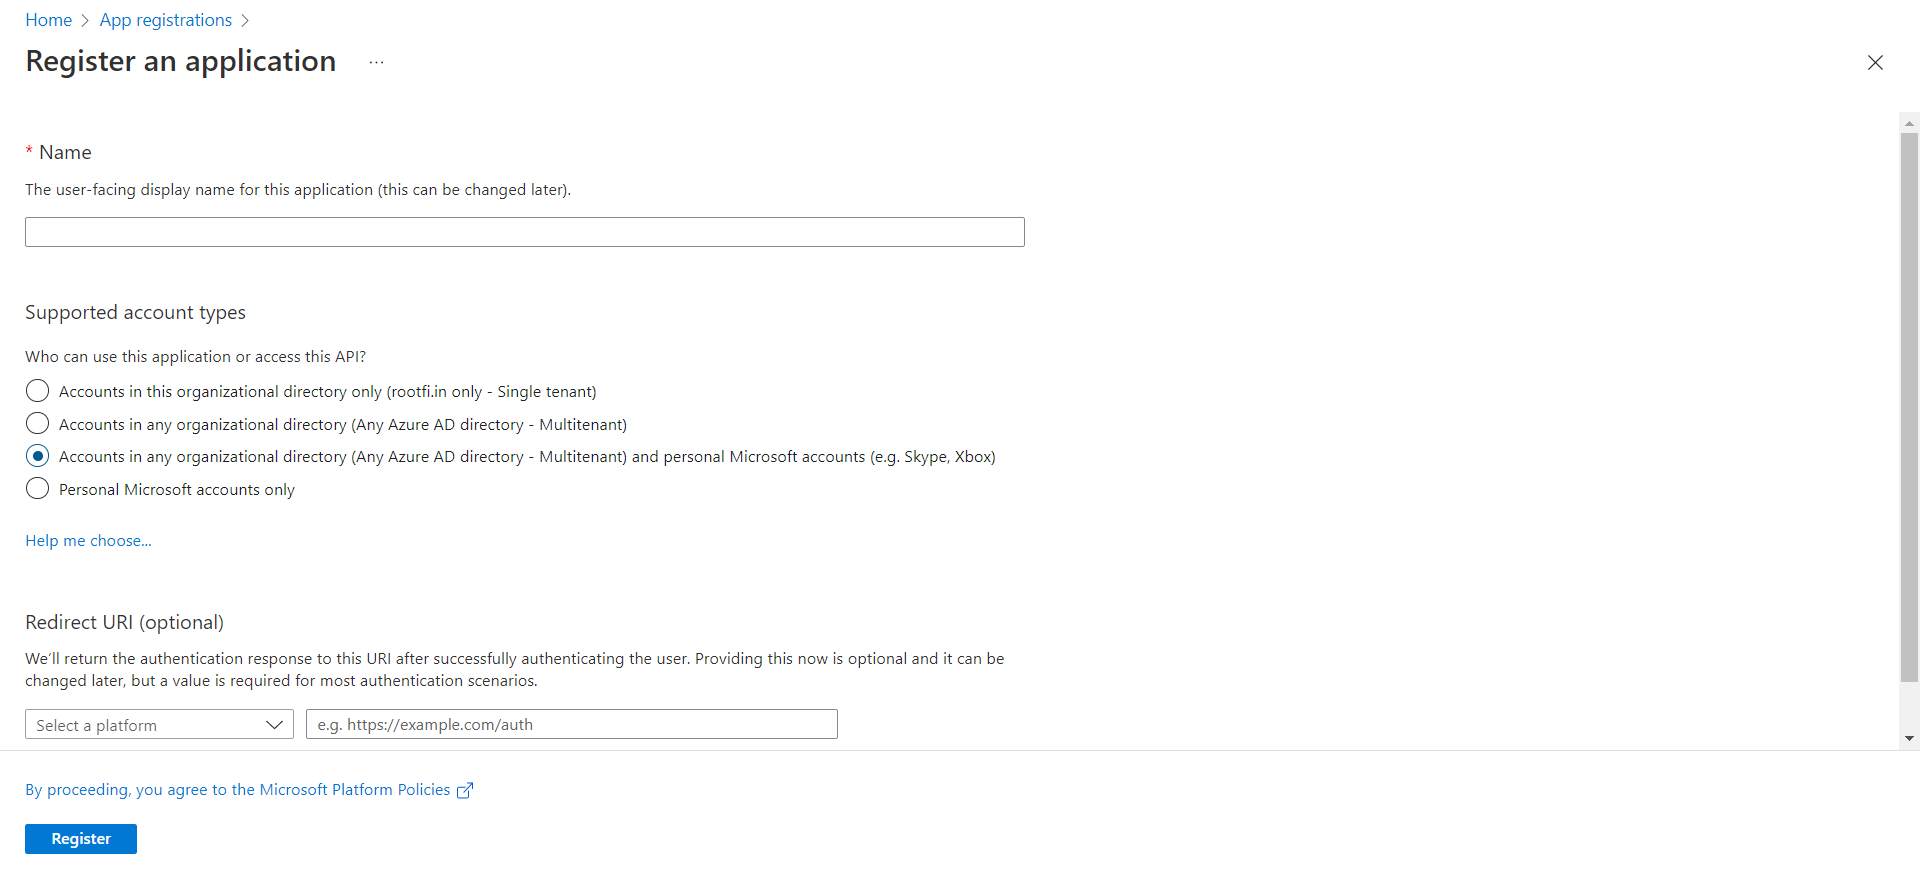
- Enter the user-facing display name for this application (this can be changed later).
- Select Supported account types: Select Accounts in any organisational directory (Any Azure AD directory - Multi-tenant) and personal Microsoft accounts (e.g. Skype, Xbox). This allows RootFi to access data in Dynamics 365 F&O.
- In the Redirect URI, select the dropdown value as Web and in the value, paste the url, ROOTFI CALLBACK URL
- Now Click the Register Button, now you have created an app.
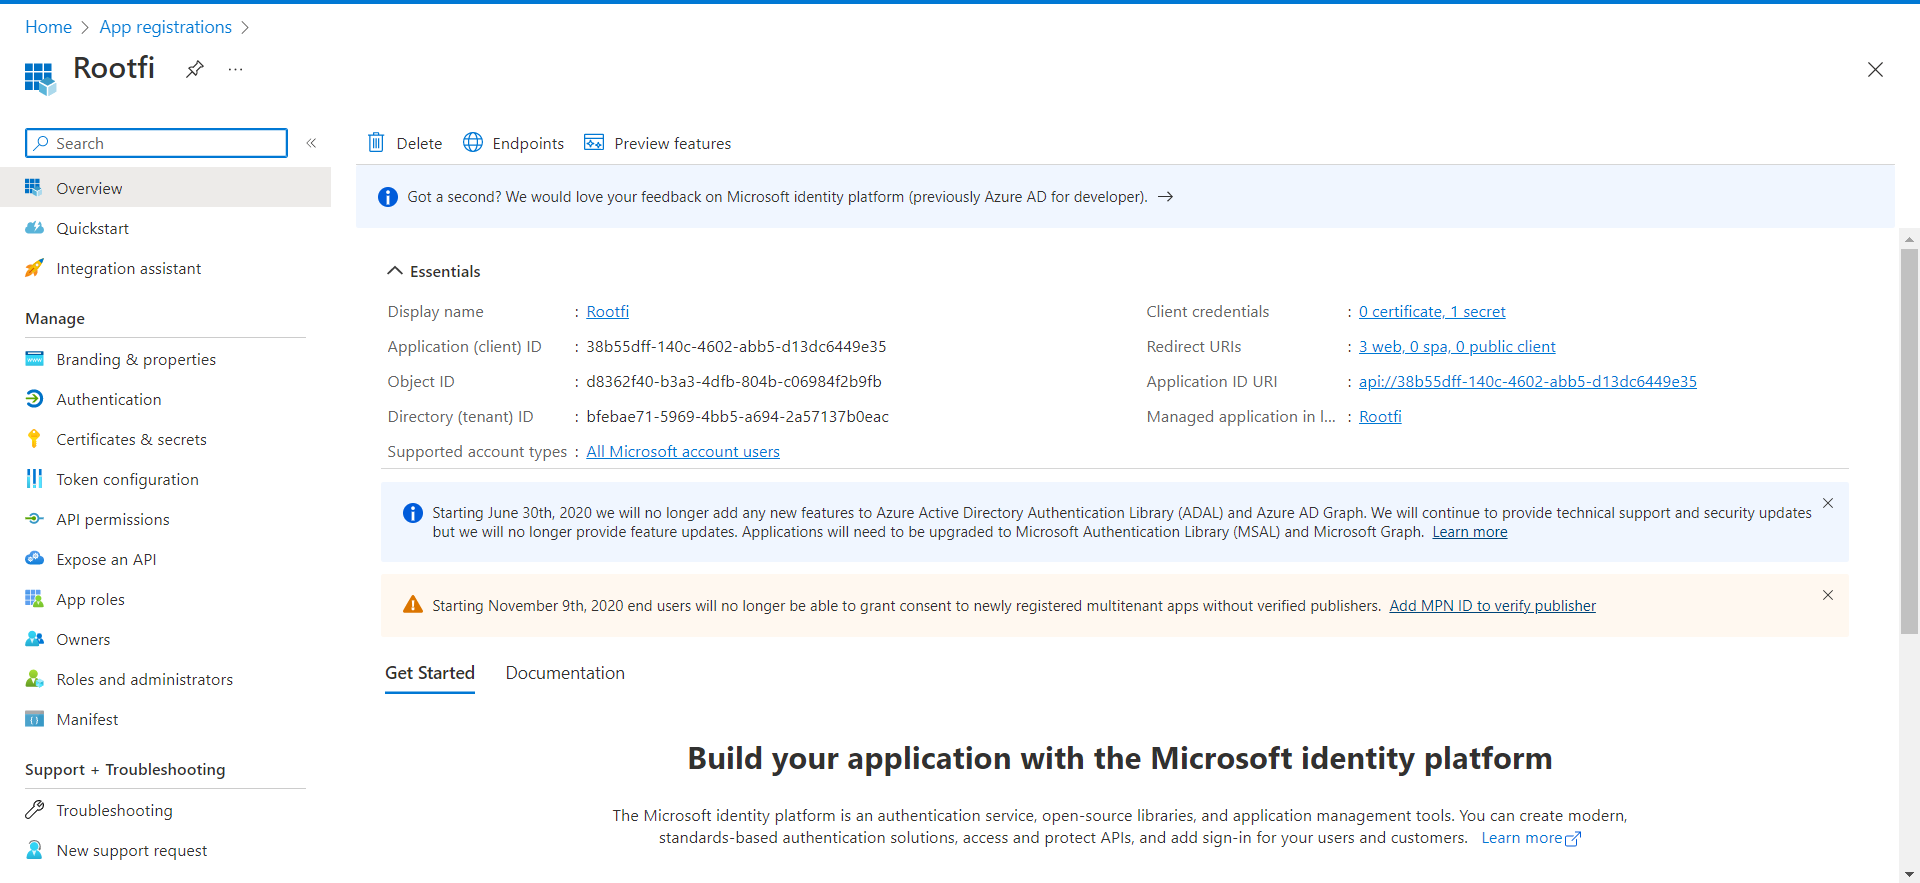
- Below, You can see the newly created app.
Part 2: Copy Client ID and Client Secret
- Click on the newly created app, Go to the Overview section, you can see the Application Client ID similar to 38b55dff-140c-4602-abb5-d13dc644.
Part 3: Generate and retrieve your client secret
In the Azure Portal:
- Select Certificates & secrets in the left menu.
- Under Client secrets, click New client secret.
- In the Add a client secret dialogue, update the following information:
- Description: Enter a short description of your client secret to make it easier to find.
Expires: Select the most appropriate option that complies with your company’s security policy.
Click Add.
Your client secret is generated and displayed at the bottom of the page.
ImportantThe secret value won’t be displayed again in full, so you must copy the value as soon as it gets generated.
Part 4: Enter Your Client ID and Client Secret on the RootFi Dashboard
- Login to the RootFi dashboard.
- Select the ‘Integrations’ tab on the sidebar - here you will see a list of platforms you can integrate with.
- Click the ‘Set Up’ button on the MS Dynamics 365 card.
- When the form opens up simply enter the ‘Client ID’ and ‘Client Secret’ that you generated and click ‘Save’.
Adding OAuth Credentials to Clients F&O Account
These steps have to be followed by the end-user who is connecting their F&O account to RootFi.
Part 1: Set up the F&O account to access the data.
When your customer is connecting their MSD F&O account to RootFi, they will need to enter the client credentials in their F&O dashboard to allow RootFi to access the data.
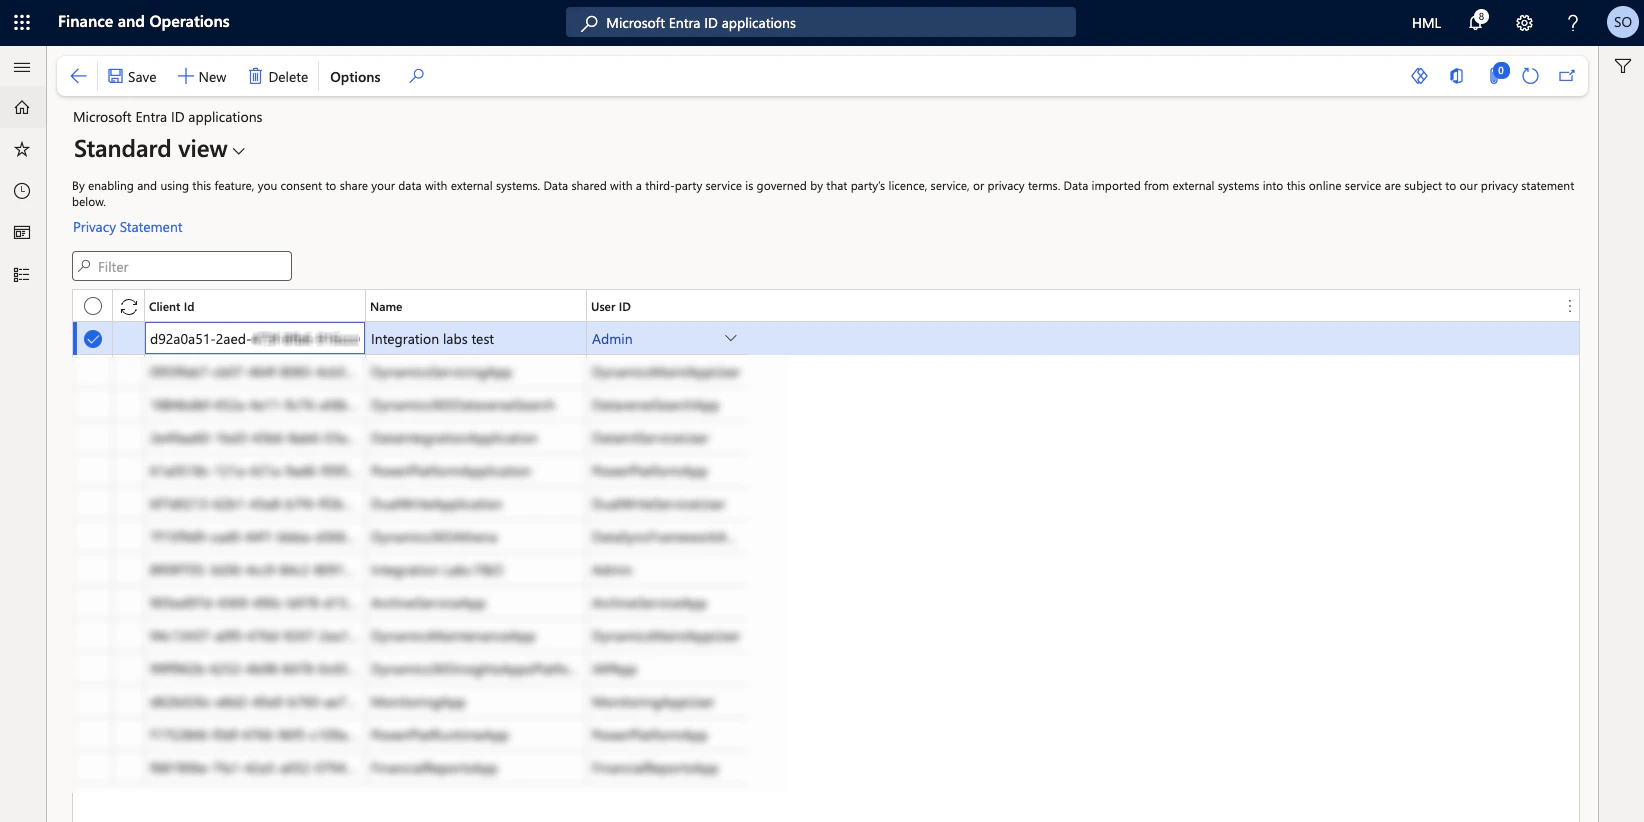
- Login to the F&O dashboard and navigate to Microsoft Entra ID applications.
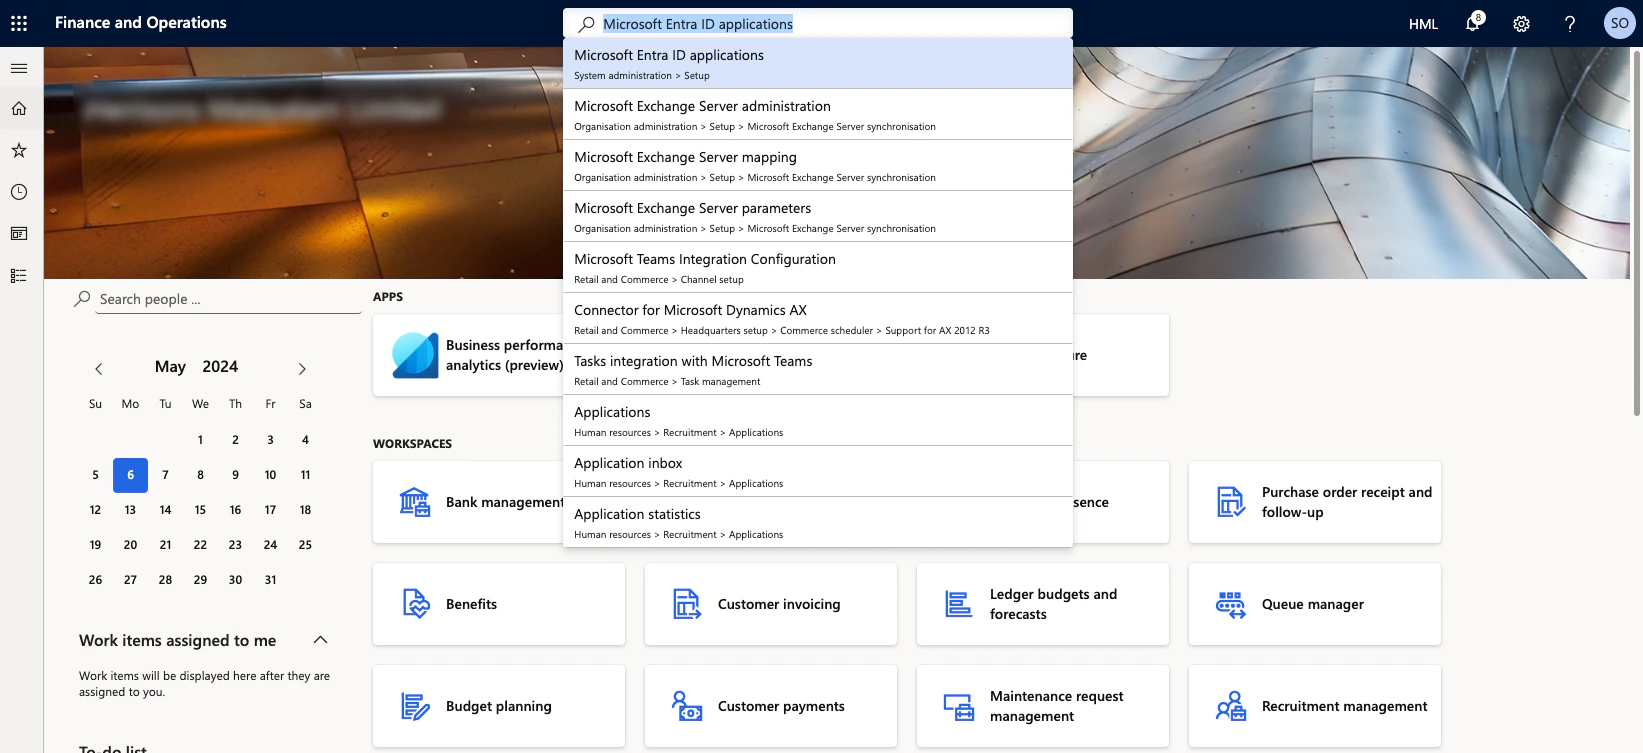
- Click on ‘+New’ and enter the client id you copied from the Azure portal, enter a name and set the User ID to ‘Admin’. Enter ‘8f09f705-3d36-4cc9-84c2-8091e362c759’ as the client id if you are using RootFi credentials.
Part 2: Setting up the integration Using RootFi Connect
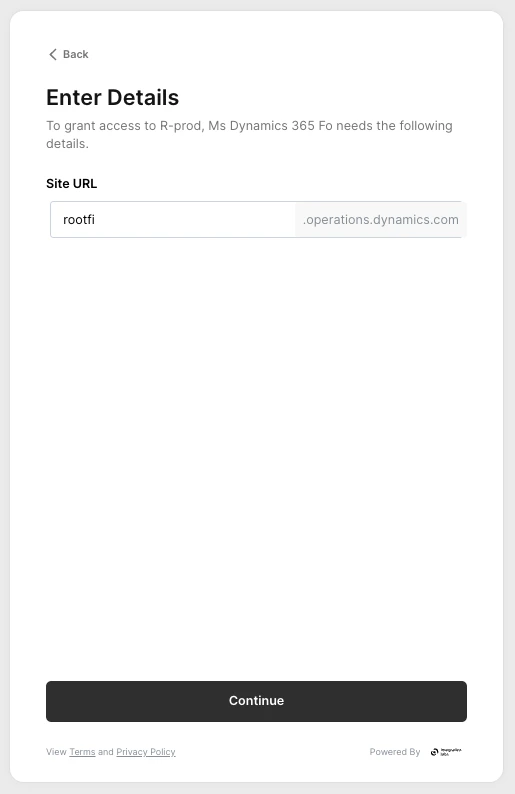
You will need to enter your F&O site url in the RootFi connect screen.
- To get the site url, navigate to the F&O dashboard and copy the url from the address bar.

- In the RootFi SDK screen, paste the site url of your F&O dashboard without the ‘https://’ and ‘opearations.dynamics.com’ part.